Managing projects
Speechly is structured around projects, applications and users.
Projects in Speechly serve as the top-level entity that consists of applications, users, api tokens, billing and monitoring tools. Projects are separate environments with no connection to one another. Certain features (like downloading model bundles or audio adaptation) are only available to projects on Enterprise plans.
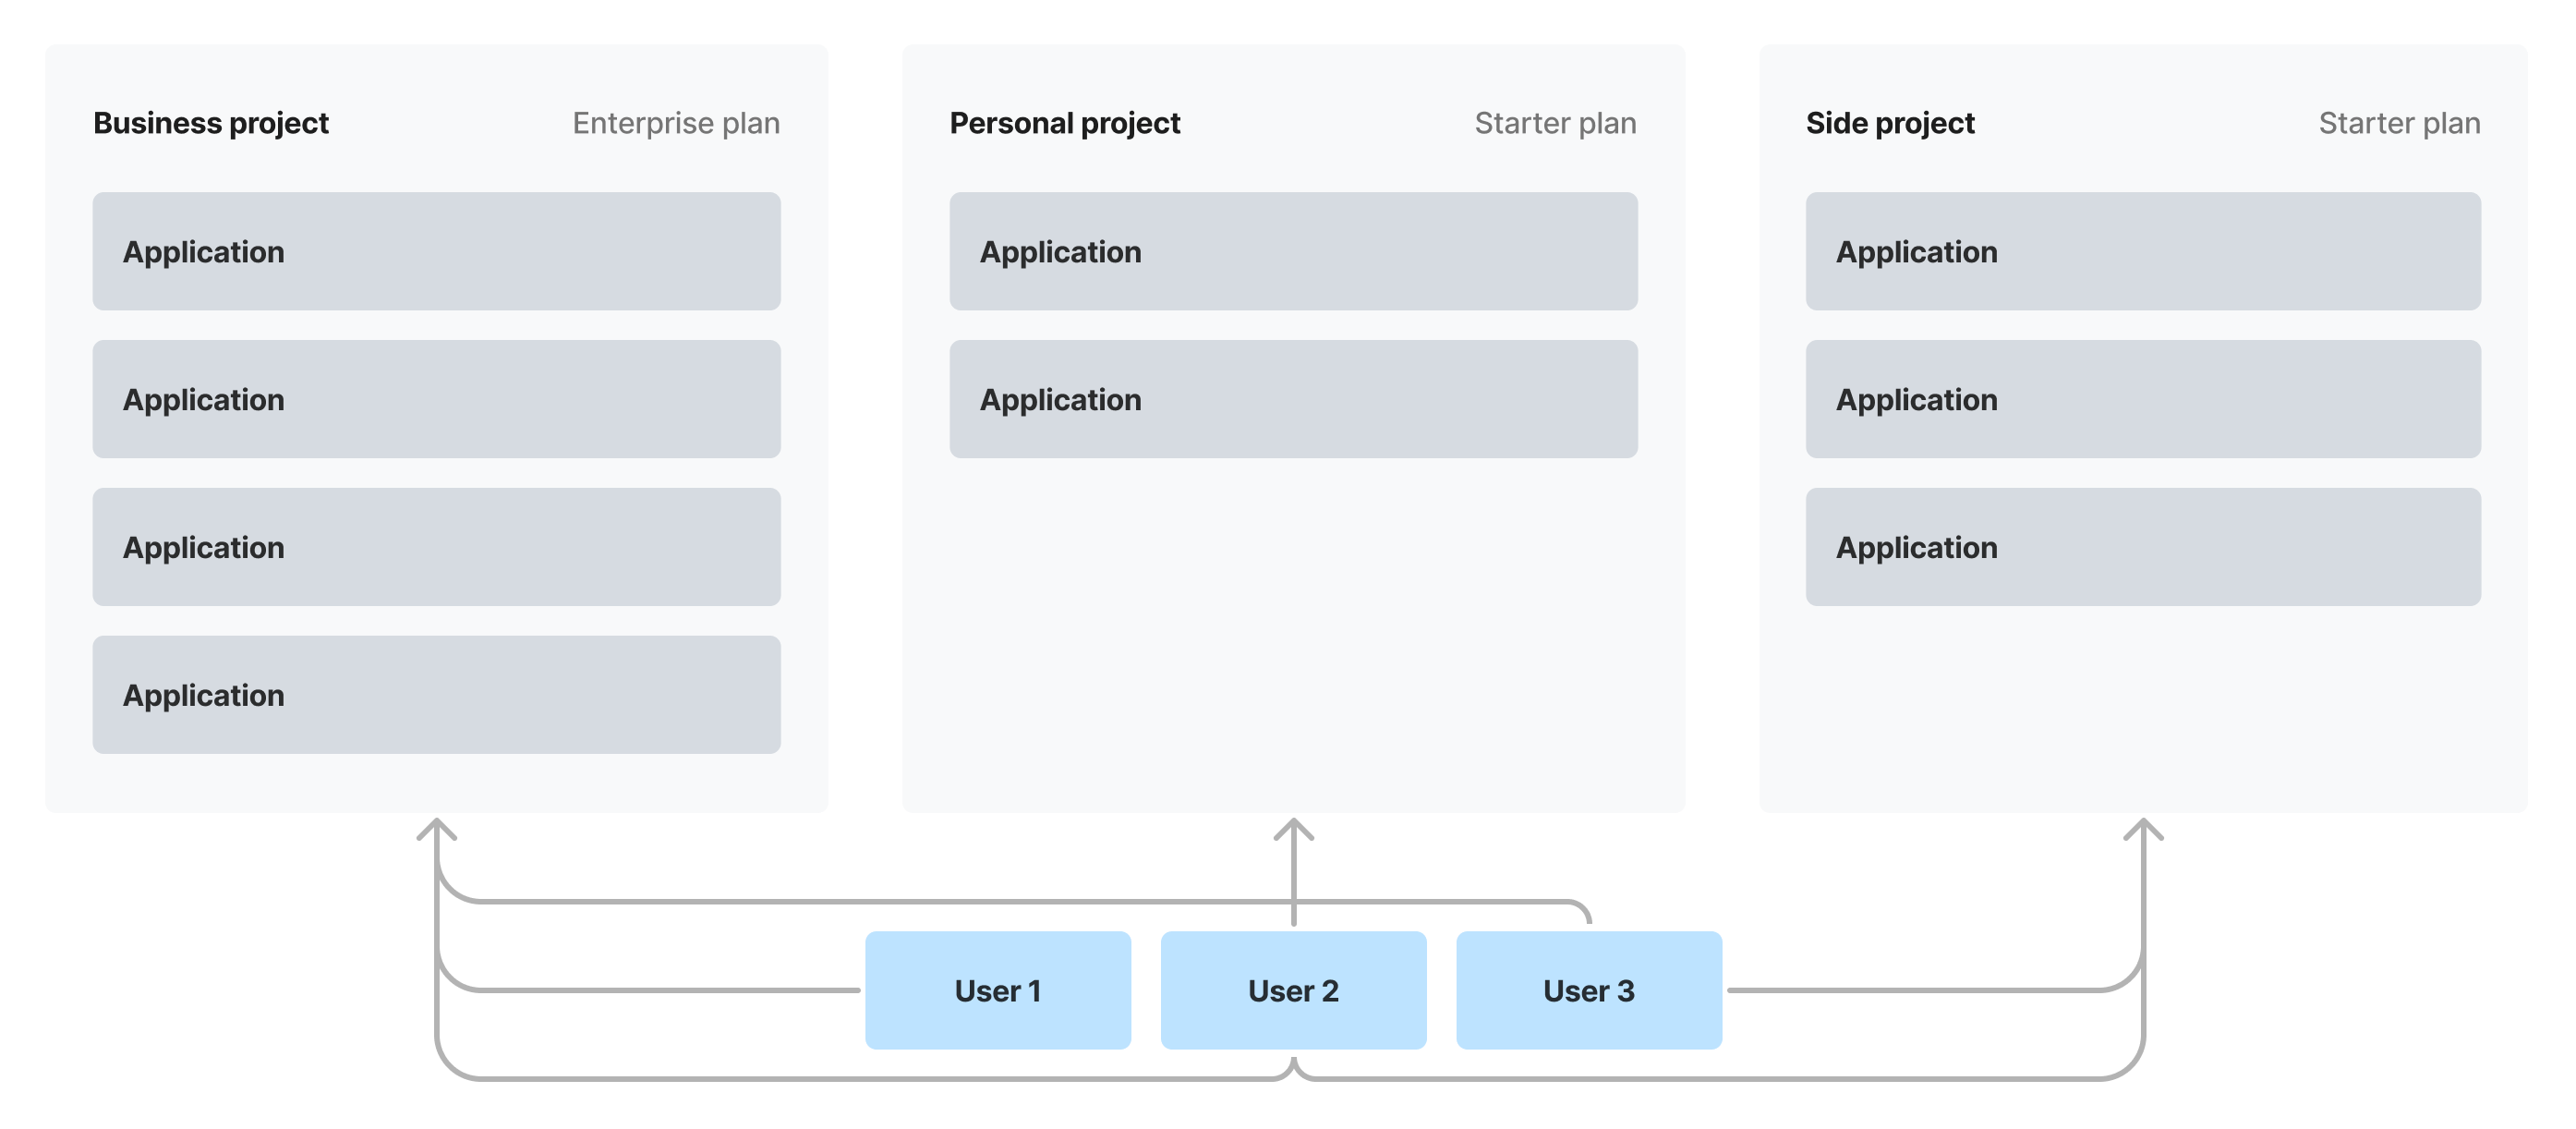 How Speechly Projects are structured
Creating new projects
When you sign up for a Speechly account, you automatically create your first project. For trying out Speechly, one project is usually sufficient. However, it might be useful to create multiple projects when:
- You want one project for personal use and one for business use
- You have multiple, unrelated, business projects which are owned by different teams inside your organization
- Your business focuses on selling services to other companies and you want to create projects for your customers for billing and hygiene purposes
To create a project:
- Log in to Speechly Dashboard
- Open the Projects menu in the top-left corner
- Select Create new project
- Give the project a name and press Create
Managing multiple projects
Working with multiple projects requires you to just pay attention to what project you are currently in. A project must have at least one user and project deletion is handled by submitting a request to the Speechly team.
To switch between projects:
- Log in to Speechly Dashboard
- From the Projects menu, select the project you want to view
With Speechly Dashboard you can:
- Manage applications
- Manage users
- Create API tokens
Speechly CLI
Speechly CLI is focused on working with applications and has no project management features. If you need to access multiple projects using Speechly CLI, you must create a separate API tokens for each project.
List all projects that you have added:
speechly projects
Switch between projects:
speechly projects use
Adding an existing project:
speechly projects add --apikey YOUR_API_TOKEN
See Using Speechly CLI to learn more.
Managing users
After you have created a project, you can invite users to it. Speechly users can belong to as many projects as they like and they all have the same access rights.
To invite a user to your project:
- Log in to Speechly Dashboard
- From the Projects menu, select the project you want to invite a user to
- Go to Project settings → Users
- Press Invite a user
- Press Generate invite link and send it to the user you want to invite
Invite links are one-time links that require the recipient to have an Speechly account. If you need to invite several users, generate a link for each of them.
To remove a user from your project:
- Log in to Speechly Dashboard
- From the Projects menu, select the project you want to remove a user from
- Go to Project settings → Users
- Find the user you want to remove and press Remove
- Confirm the removal
Speechly CLI uses API tokens to access projects. To completely revoke a users access to the project, remember to delete any API tokens created by them.