Deploying Speechly On-device
In this guide you'll learn how to get started with Speechly On-device using iOS, Android and C example applications.
Prerequisites
Please note that deploying Speechly on-device is only available on Enterprise plans.
Select an appropriate model
For on-device use, only small models are currently supported.
- Speechly Dashboard
- config.yaml
- Go to Application → Overview → Model
- Select the
smallmodel you want to use
Add the following line to your config.yaml:
model: small-lowlatency-LATEST
Download model bundle
To use the Speechly Decoder library you need a model bundle. They are available for three different machine learning frameworks: ONNX Runtime, TensorFlow Lite and Core ML. All model bundles have a predefined lifetime after which the Speechly Decoder library refuses to load the model.
- Speechly Dashboard
- Speechly CLI
- Go to Application → Overeviw → Model
- Click the version you want to download
Use the download command:
speechly download YOUR-APP-ID . --model coreml
# Available options are: ort, tflite, coreml and all
Download Speechly Decoder library
The Speechly Decoder library is available for Android, iOS, and Unity. Integrating the library doesn't require expertise in speech recognition, but you must be able to capture real-time audio from the device microphone.
You can download the library from Speechly Dashboard by going to Application → Integrate.
iOS
Before starting, make sure you have:
- Created a Speechly application. For on-device use, only
smallmodels are currently supported. - You will also need the Core ML model bundle and the Speechly Decoder iOS library.
Copy the example app
Copy the iOS example app using degit:
npx degit speechly/speechly/examples/ios-decoder-example my-ios-app
cd my-ios-app
Add dependencies
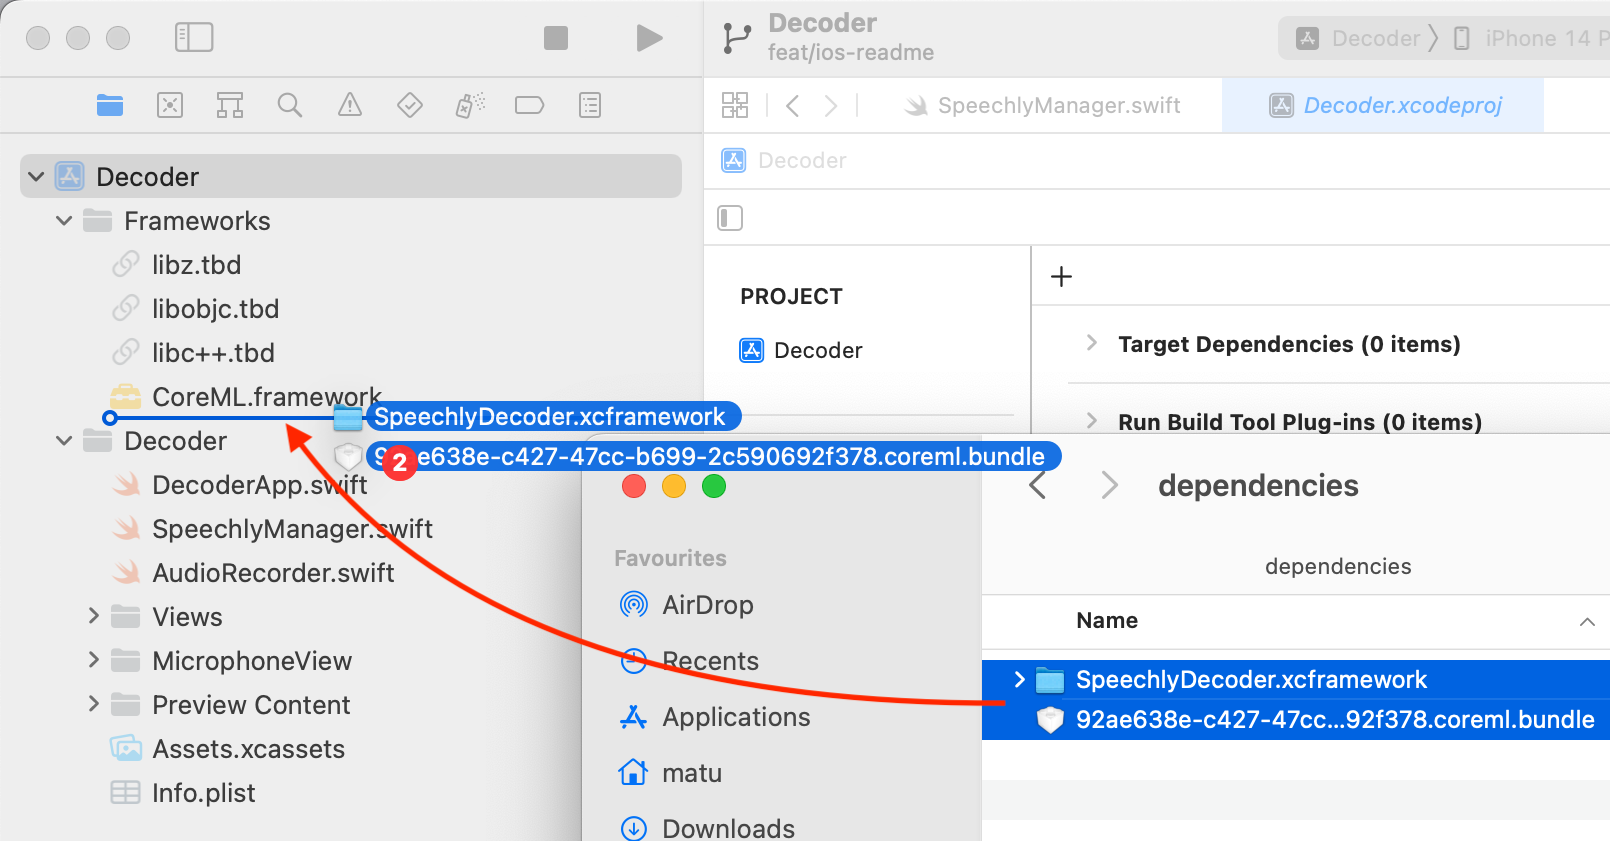
Open Decoder.xcodeproj in Xcode and add both SpeechlyDecoder.xcframework and YOUR_MODEL_BUNDLE.coreml.bundle to the project by dragging and dropping them into the Frameworks folder:
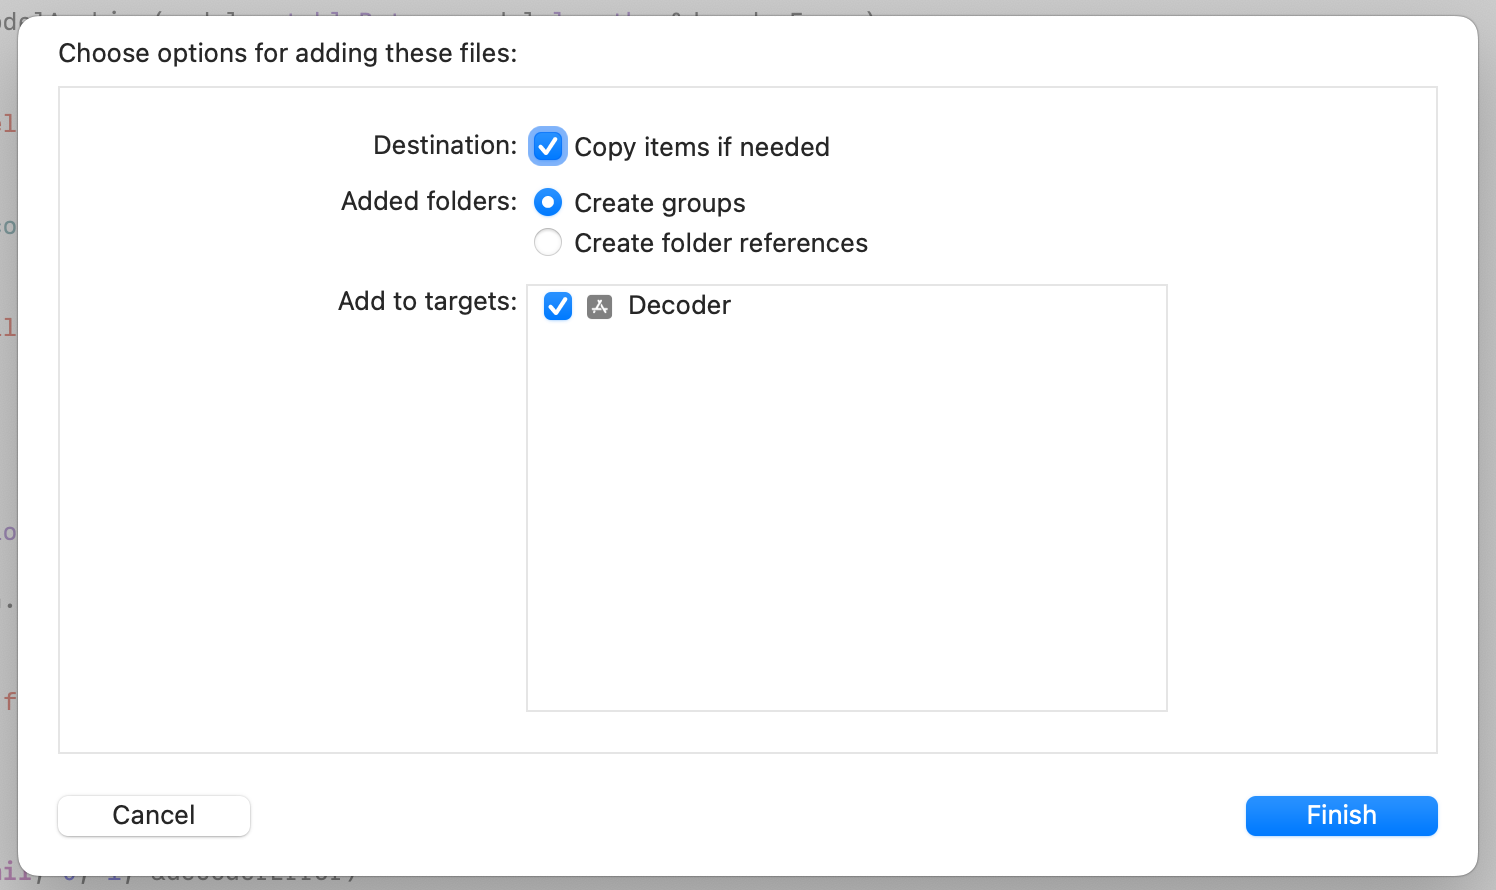
Make sure Copy items if needed, Create groups and Add to targets are selected:
In Decoder/SpeechlyManager.swift update the model bundle resource URL:
let bundle = Bundle.main.url(
    forResource: "YOUR_MODEL_BUNDLE.coreml",
    withExtension: "bundle"
)!
Run the app
Run the app and grant it microphone permissions when prompted.
Android
Before starting, make sure you have:
- Created a Speechly application. For on-device use, only
smallmodels are currently supported. - You will also need the TensorFlow Lite model bundle and the Speechly Decoder Android library.
Copy the example app
Copy the Android example application using degit:
npx degit speechly/speechly/examples/android-decoder-example my-android-app
cd my-android-app
Add dependencies
Put SpeechlyDecoder.aar in a directory that gradle can find. For example, add a flatDir field to the repositories section in your settings.gradle:
pluginManagement {
    repositories {
        flatDir {
          dirs '/path/to/decoder'
        }
    }
}
In your build.gradle dependencies section add:
dependencies {
    implementation 'org.tensorflow:tensorflow-lite:2.9.0'
    implementation(name:'SpeechlyDecoder', ext:'aar')
}
If the file is packaged as part of the application, it may be good to ensure that it is not compressed when building the .apk by updating the android section in your build.gradle:
android {
    aaptOptions {
        noCompress 'bundle'
    }
}
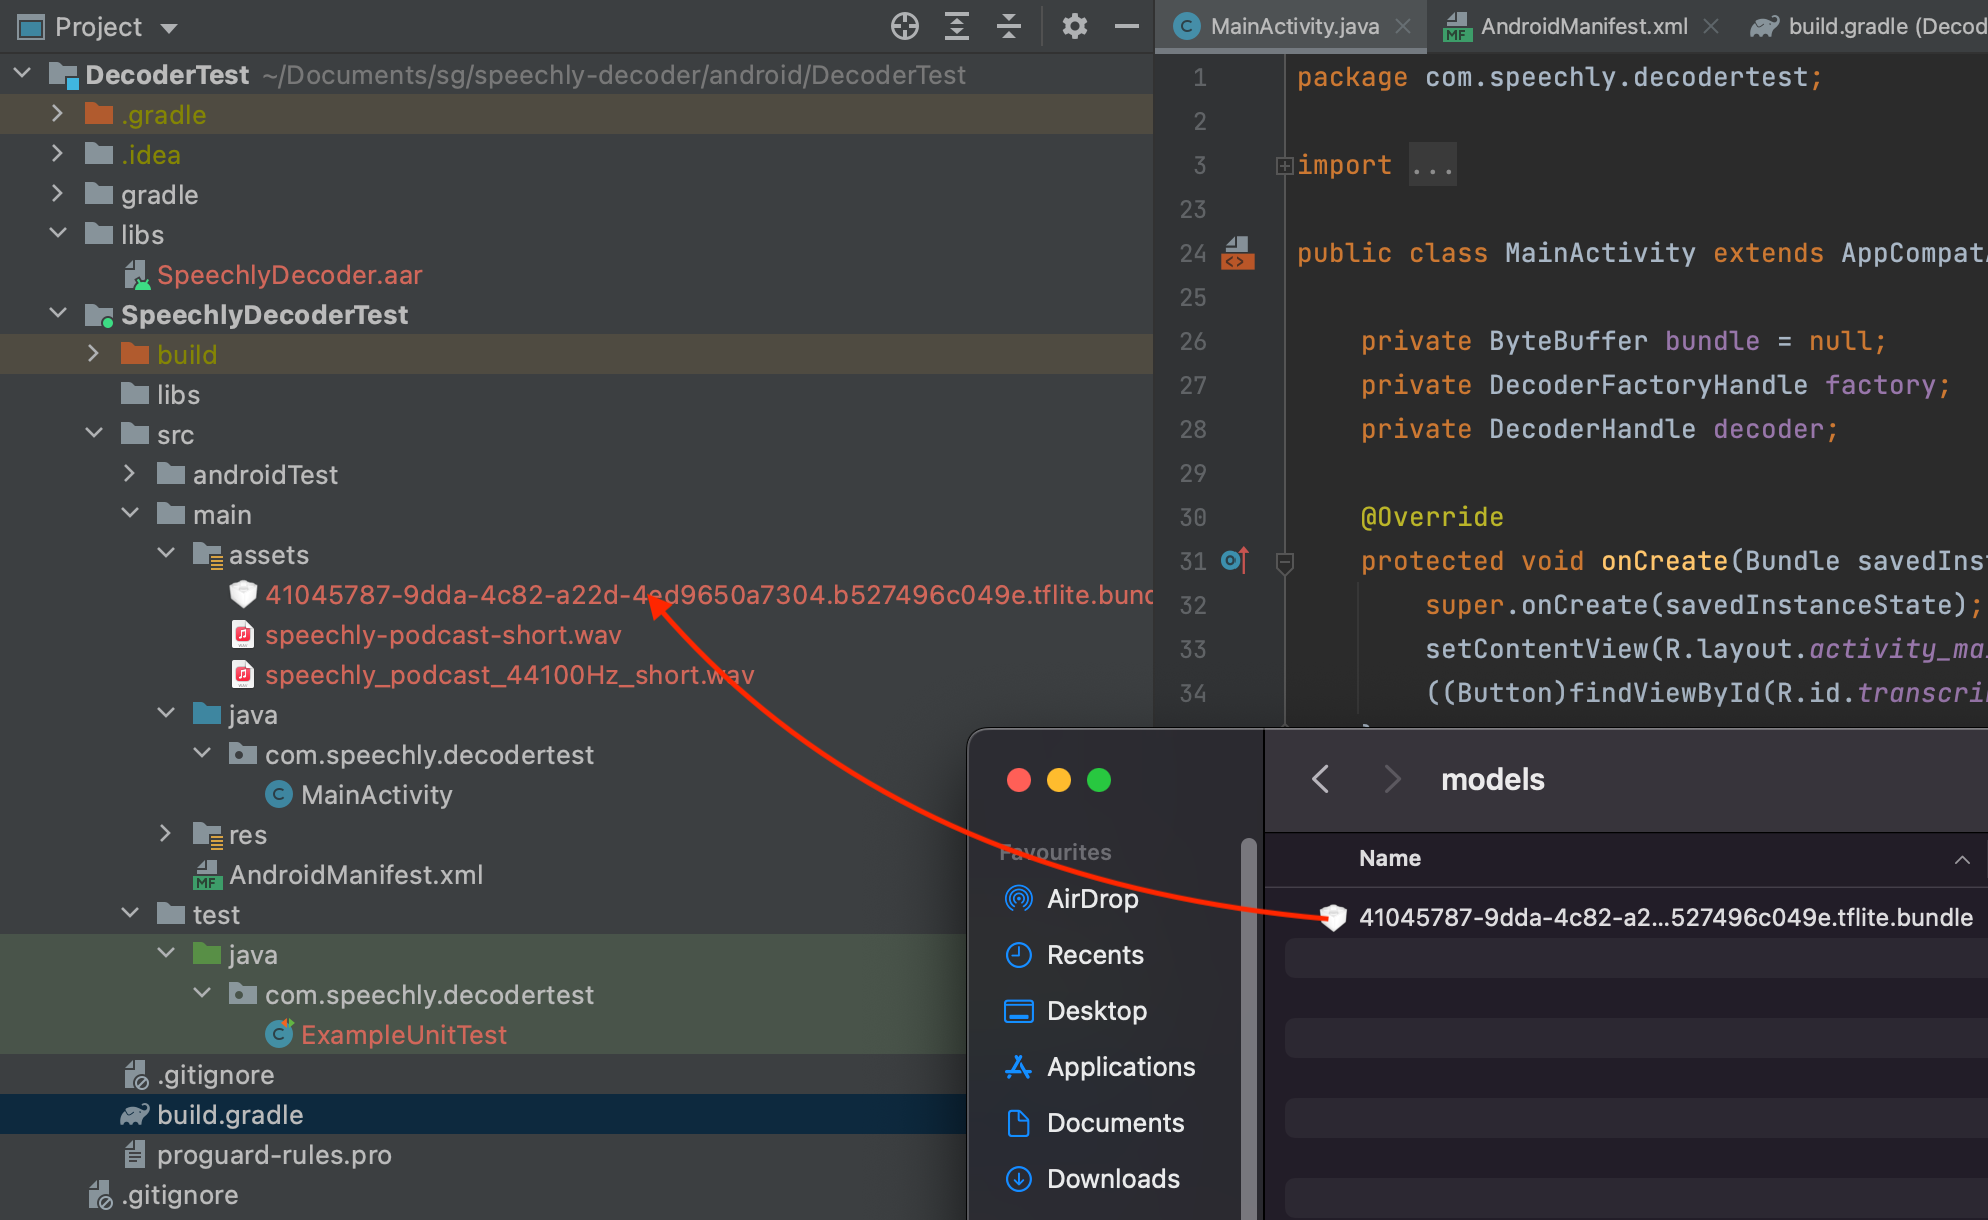
Open DecoderTest in Android Studio and add YOUR_MODEL_BUNDLE.tflite.bundle to the project by dragging and dropping it into the build/src/main/assets folder:
In MainActicity.java update the model bundle resource:
this.bundle = loadAssetToByteBuffer("YOUR_MODEL_BUNDLE.tflite.bundle");
Run the app
Run the app and grant it microphone permissions when prompted.
C
If you would like to try out Speechly on-device streaming transcription using plain C, there's a C example program that you can compile and run. The repository contains a readme on how to use it and any prerequisites it may have.